1. In Brightspace, navigate to your course.
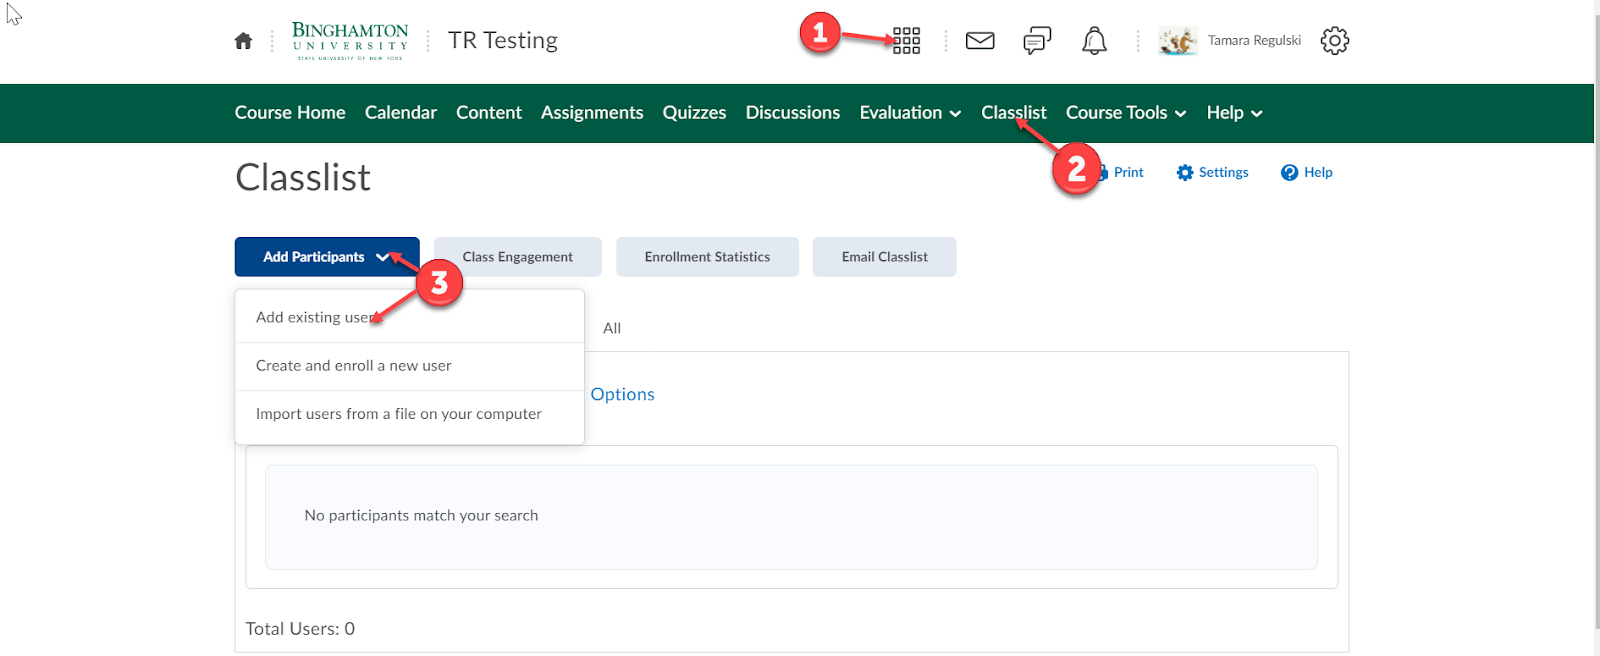
2. On the navbar, click Classlist.
3. From the Add Participants drop-down menu, select Add Existing Users.
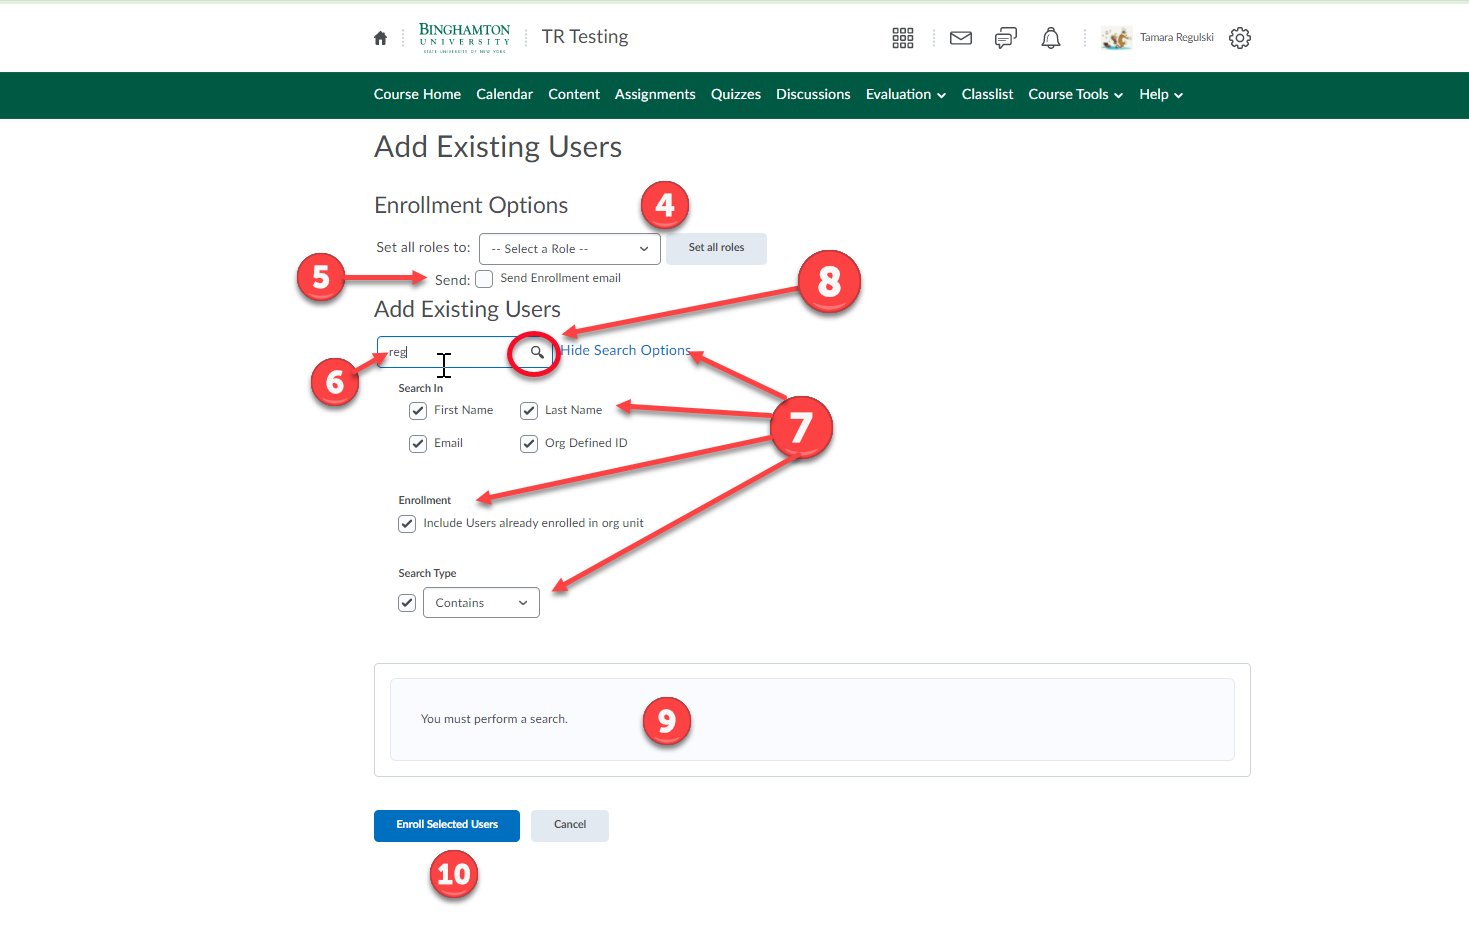
4. Enrollment Options: used when adding more than one person at a time. It allows you to "Set all roles" to TA or Learner at once rather than one at a time. This doesn't have to be filled in. Skip it if you are only enrolling only one person.
5. To send the user an enrollment email, select the Send Enrollment email check box.
6. Add Existing Users: Type the person's name or some identifying information in the Search field and click the magnifying glass. They will appear at the bottom of the page if they are found. If they are not found you can adjust the "Search Options" or type a more specific identifier for them in the search box.
7. Click Show Search Options to expand the choices.
- Search In - You can check them all if your user was not found. Be sure that "Org Defined ID" is chosen if you are searching using their B#. In Brightspace the "Org Defined ID" is the B# it appears like this "B00123045".
- Enrollment - To set the search filter to filter out users already enrolled in the course, deselect the Include Users already enrolled in the org unit check box.
- Search Type - The option Contains is the best choice here unless it returns too many choices. You can narrow that search by choosing either Starts With or Exact Match.
8. Click the magnifying glass search icon.
9. The results will appear at the bottom of the page. In the search results list, check the box alongside the name of the user you want to add, select the appropriate role for the user and select a section. You still have to select a section even if there is only one. If your course is cross-listed then use the role "TA - All Section Access" and they will then have access to all sections even when only adding them to one.
10. Click Enroll Selected Users.
11. Click Done