Each semester new, empty courses appear in Brightspace and you need to add your content to them. However, each semester you do not have to re-create the wheel. You can copy content uploaded, assignments, quizzes, or entire courses from previous semesters. There are several ways to copy content but this article focuses on the use of the "Import / Export / Copy Components" tool.
1. Go to the new course or the one that needs the content copied into it. Click on Course Tools in the green navbar.
2. Click Course Admin.

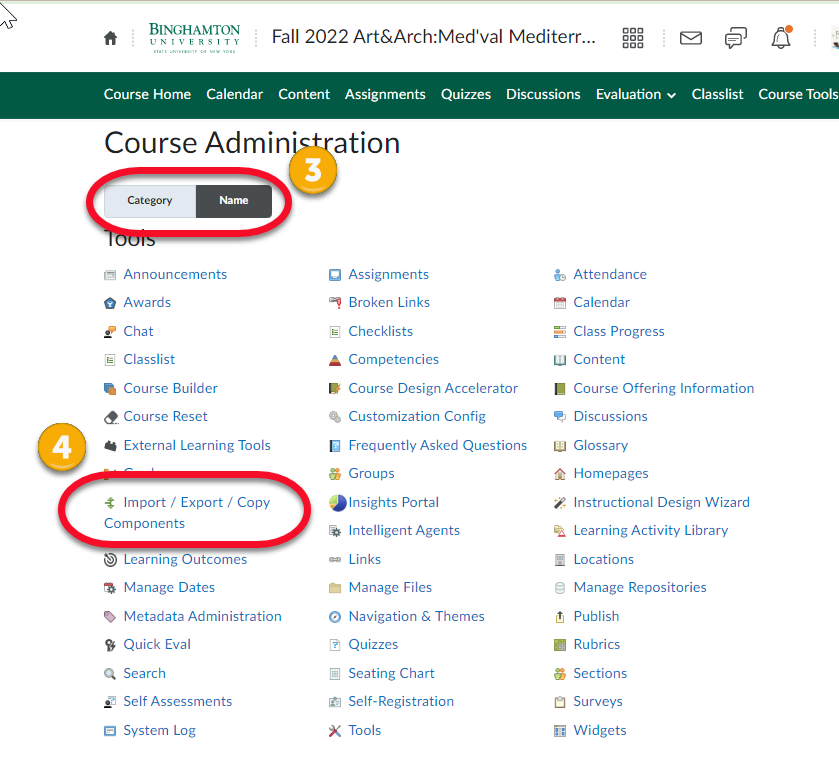
3. There are two different views for this Course Administration page. The view shown here is by “Name”.
4. Click into “Import / Export / Copy Components”

5. Copy Components is the needed option and it is already the default setting.
6. Click “Search for offering” to look up and assign the course that has the content you want to add to this course.

7. Type something from your course name.
8. Click Search
9. Choose that course
10. Click the Add Selected button.

11. Choose to either “Copy All Components” or to copy just “Select Components”.
NOTE: If you choose "Copy All Components" you are replacing the up-to-date current "Course Tools" menu with the old version from your old course. It is recommended that every couple of semesters you choose "Select Components" instead and choose not to copy Navigation Bars. This will leave the updated navigation bar in your course rather than copying an old one over it. Here are instructions on "How To Update the Course Tools Menu".

12.. If you choose “Select Components” you will get this screen to choose what you want to copy.
13. Once you’ve made your choices click Continue.

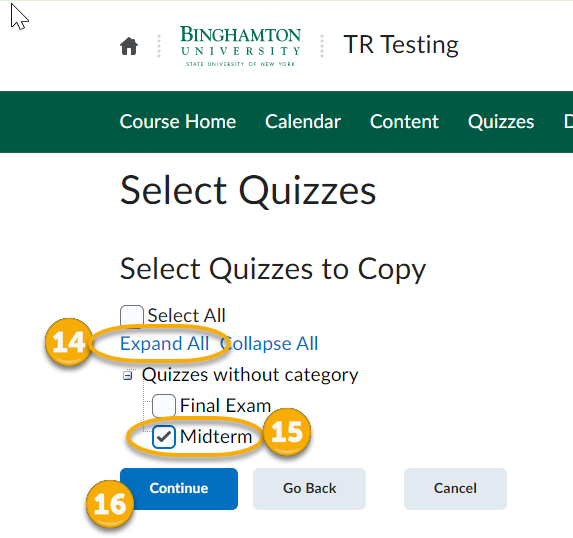
14. Click Expand all to get a listing of your quizzes or assignments or whatever component you chose.
15. Select the item you want to copy.
16. Click Continue

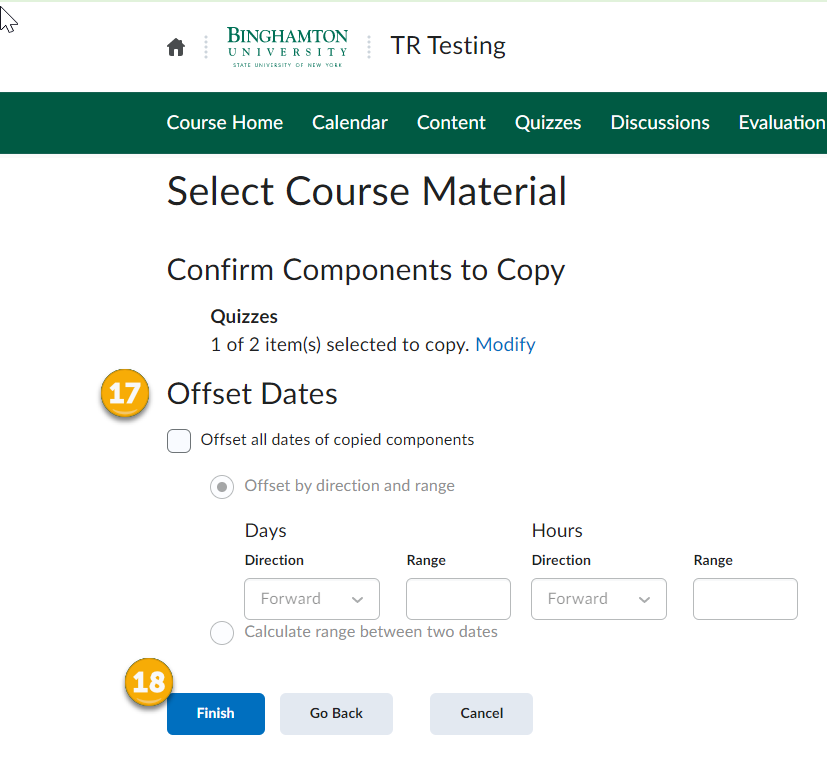
17. You can offset any dates that were set on the item you are copying in.
18. Click Finish.

A green check mark will appear when the copy is complete. You can also see the Copy History for this course here.
